WooCommerce / Sample Implementation
Discover how to easily configure Wordpress to connect to our API
Update the stock with our webservice
Preamble
This section describes how to create another import job that will update the stock using the Stanley/Stella XML Webservice. The technical details of the webservice can be found on this page.
Create a new import
Go to "All Import > New Import" and :
-
Click on "Download from URL"
-
Copy/paste the following URL : https://login:password@webservices.stanleystella.com:7448/StanleyStellaWebservice/OData/StockOverview?$filter=Is_Inventory%20eq%20true
-
Click on "Download"
-
Select "Existing Items"
-
Select "WooCommerce Products"
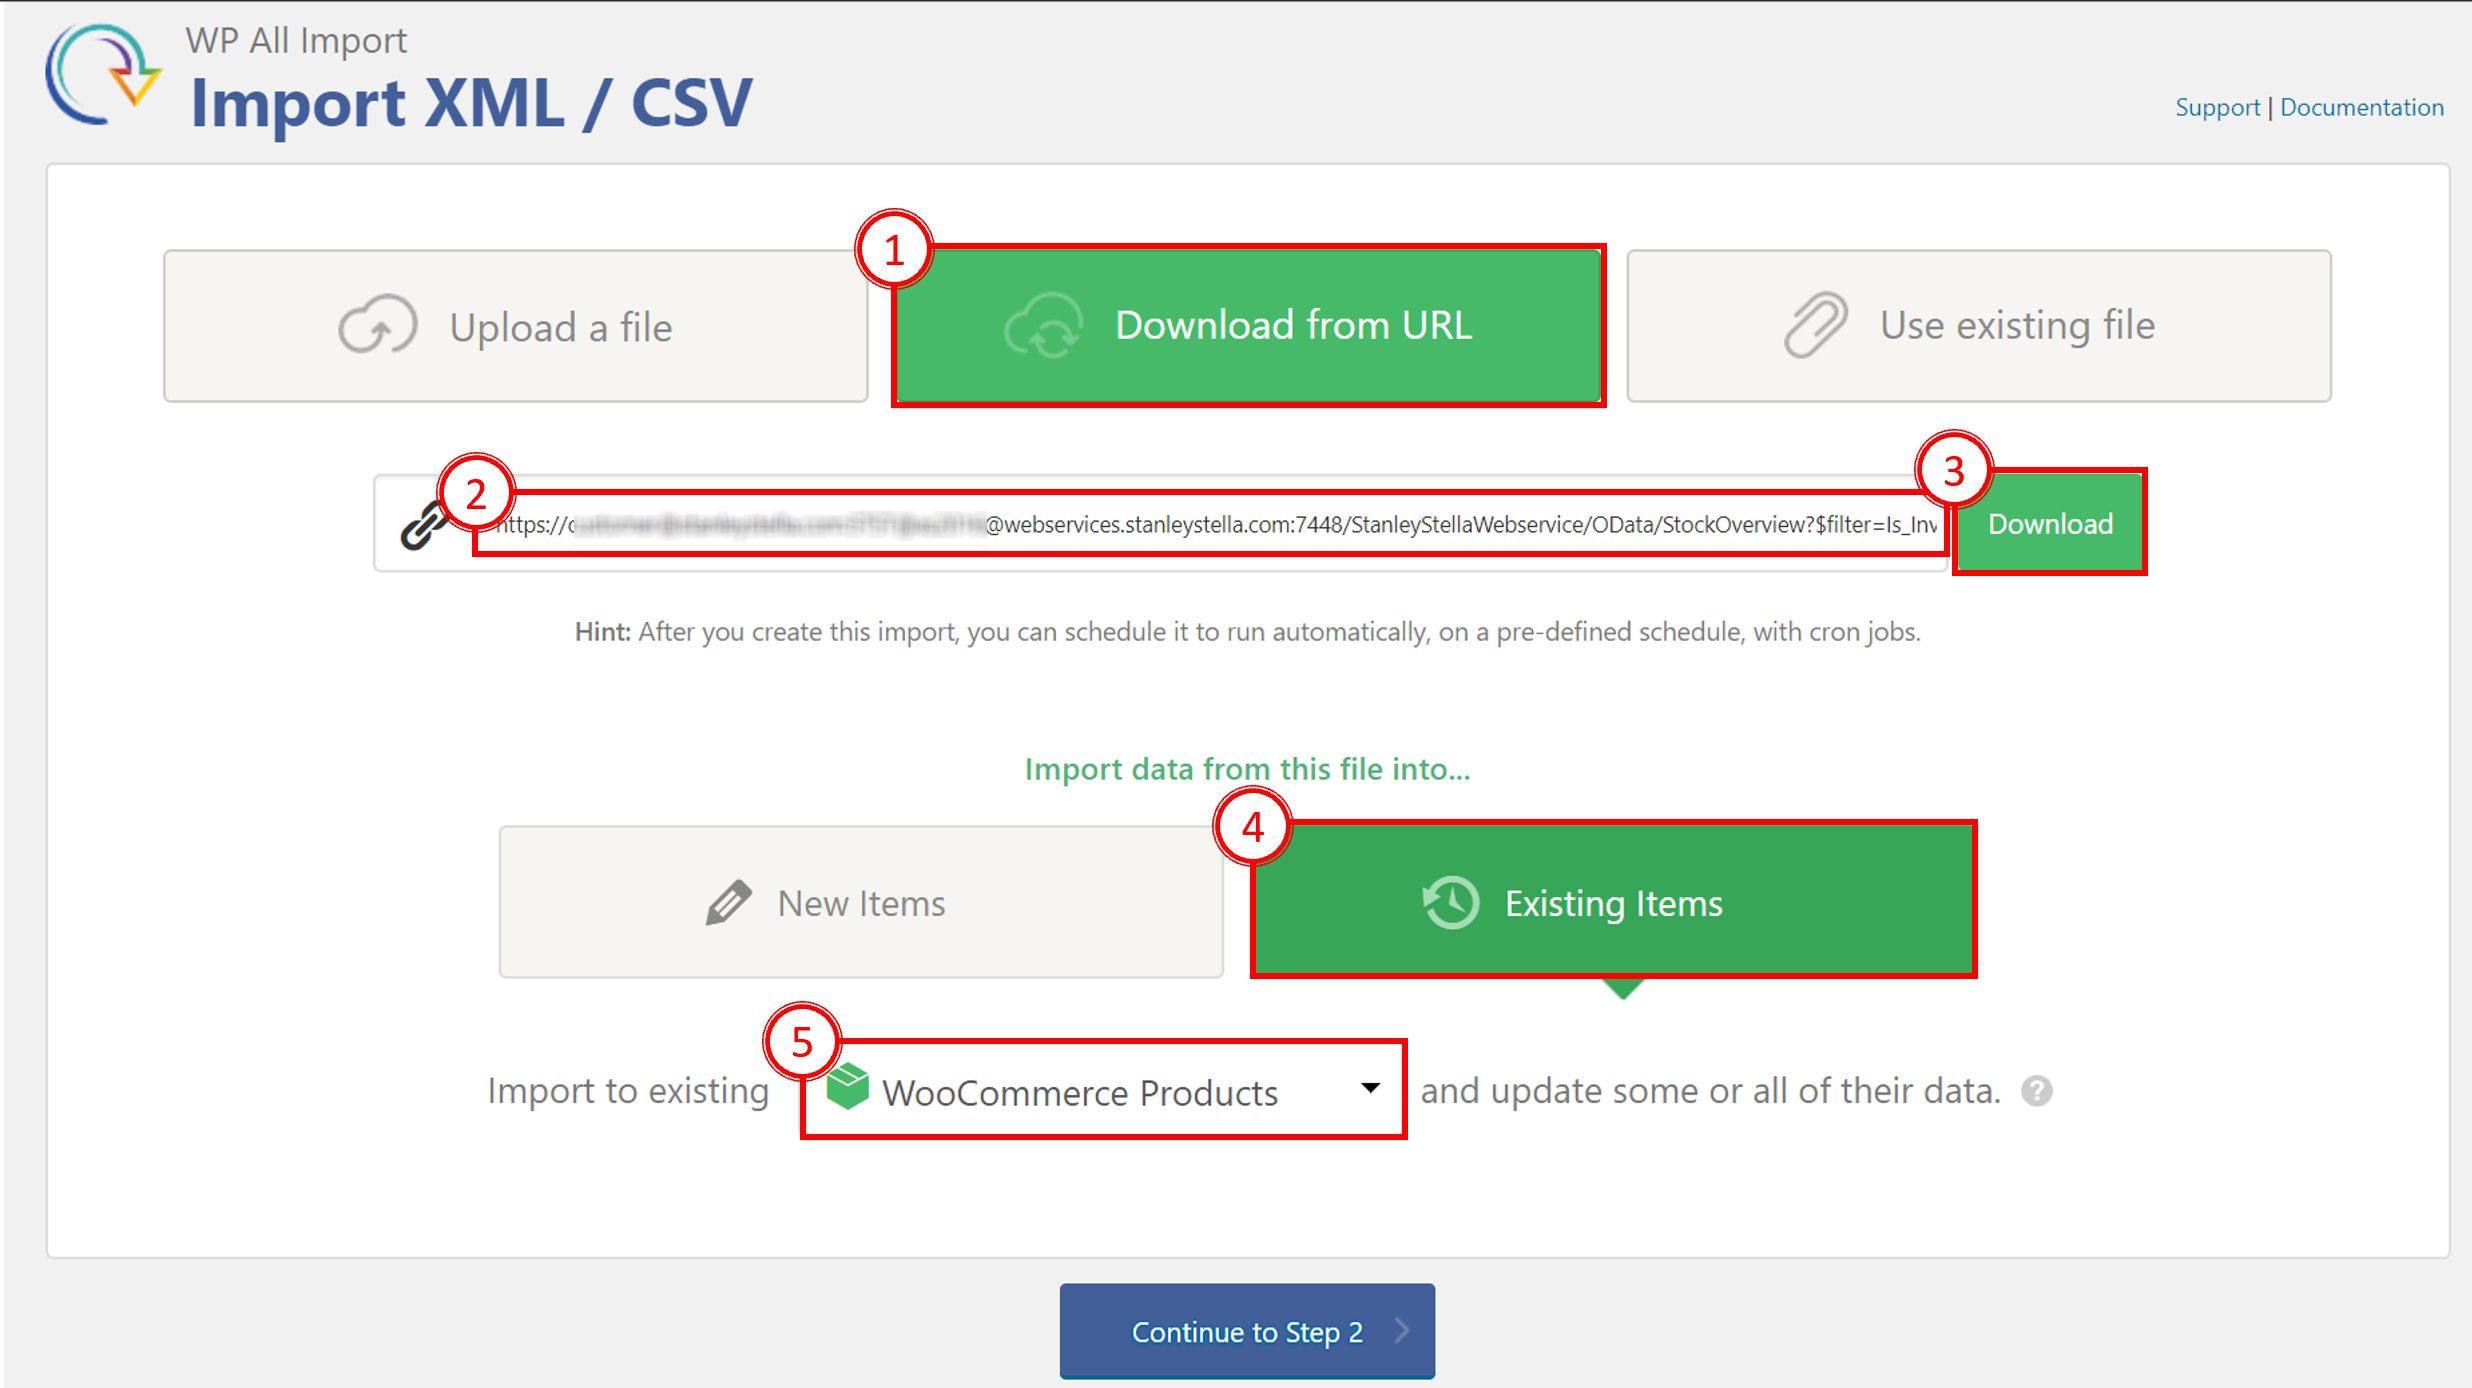
Click on “Continue to Step 2”, this shows the XML Structure of the file. Then clock on "Continue to step 3" to start mapping the fields.

WooCommerce addon setup
NOTE: depending on how you have setup your products, the below may slightly differ.
Leave everything as is and open the WooCommerce Addon part. Select "Simple Product" type (because each variant of a products has it's own SKU).
Click on "Inventory" and Select "Yes" on the Manage Stock block.
Then, open the node "Content" and "m_properties" then drag-and-drop the field "Available_Quantity" in the "Stock Qty" field.
This tells the plugin to import only the "stock" value for a product.

Finally, set the way the plugin will match results and which fields will update.
Set the match as follows:
In the "name" field type "_sku" (this is how WooCommerce refers to the SKU ref) and in the "Value" field drag-and-drop the SKU field
Select to update only existing posts with changed data to fasten the process
Select which data to update > Custom Field > type "_stock"

You can now save an run the import to update stock value.